Project Start
So in our brief we have to pick something different or something we haven't tried before. It's a research and development module where we come up with and idea and a proof of concept as the final piece. I'd quite like to tie my modules into my Final Major Project so with this in mind I think i'll pick something related to parkour and free running, particle effects or destruction. As these are all going to be used one way or another in my final piece.
Project Idea
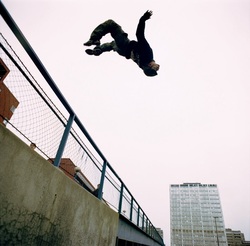
So for my AAG module i've decided to focus my project on free running as this is a main part of my FMP and any experience or knowledge I can gain will benefit me greatly.
I'm going to attempt to re-create some common free running moves and flips using various animation techniques. I'm undecided as to use motion capture or hand animation as I have yet to decide upon this for my other module.
I'm going to attempt to re-create some common free running moves and flips using various animation techniques. I'm undecided as to use motion capture or hand animation as I have yet to decide upon this for my other module.
Initial Research
So i've been looking on the internet for various techniques, plug-ins or software I can use for the project. I ended up stumbling across the endorphin engine which was used for the procedural character physics is games such as "Grand Theft Auto IV" and "Possession". I'll give it a trial as there is a 'Learning Edition'.
So here is a Youtube video I found when browsing online of someone who has attempted to re-create some parkour moves inside the endorphin engine. Overall they look pretty clean and i'm interested to see what I might be able to create with a bit of practice.
Combining Techniques
So i've got my Presentation coming up soon and i've decided to stick with endorphin for my free running. In face i'm going to attempt to combine it with some motion capture and hand animation; try and produce the most realistic motion that I can. Best of all worlds, well I hope anyway.
Post-Presentation
So I gave my presentation last week and I received some critic feedback from my tutors in which they said my project was too big, because of this i'm going to scope it down and reassess my idea with them. Overall they said I was trying to include too many pieces of software and things got a bit too complex without a real sense of goal or outcome.
New Idea and Character Mood board
So after some thought and consideration I decided to fall back upon one of my other initial ideas; The procedural destruction. This is because it is still relevant for my FMP as I am wanting to use physics to destroy my environment. Rather than just testing procedural physics I think i'm going to attempt to combine it with motion capture and have my skinned mesh being the instigating force.
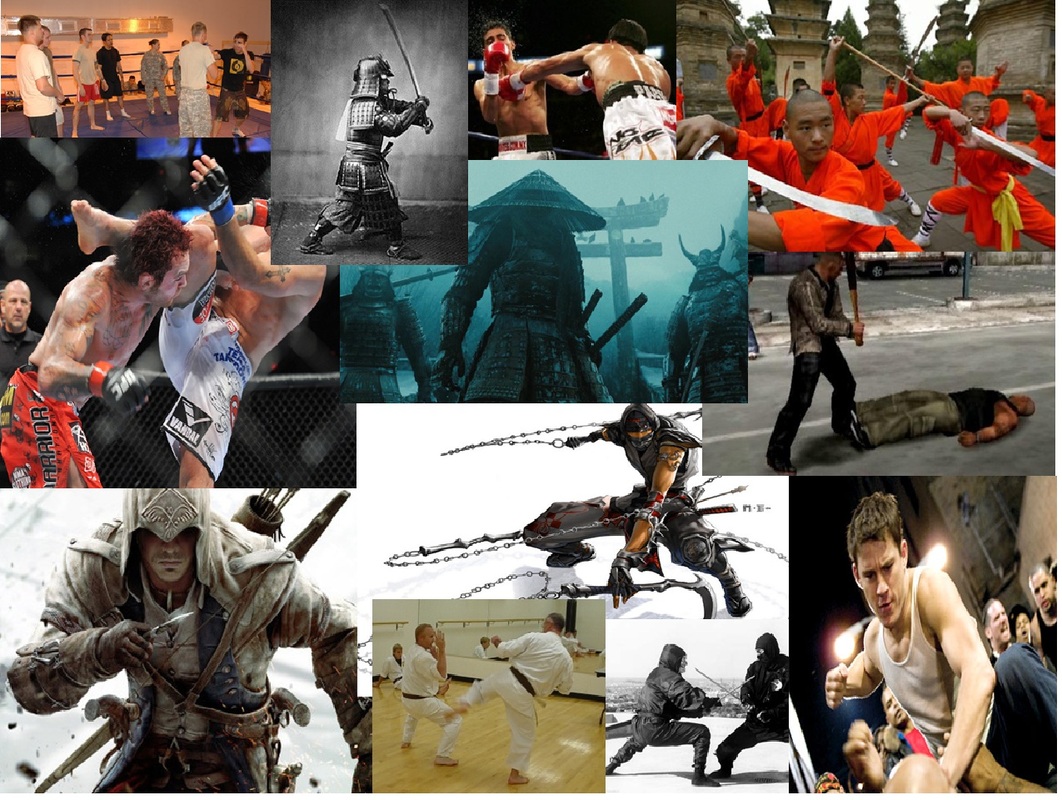
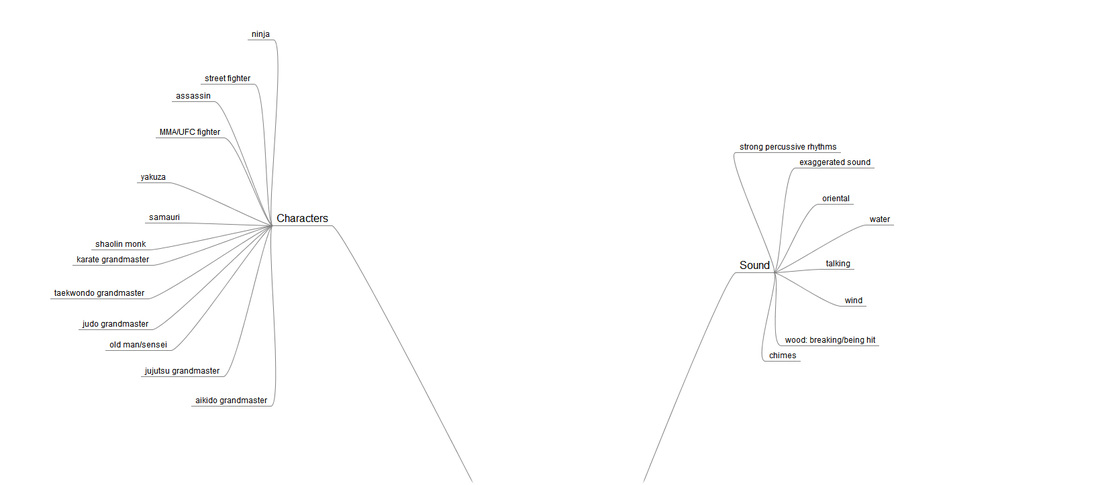
Here is my character mood board for the main character that would be motion captured. As I want my character to be some form of martial artist or trained combatant I'm going to have the character performing various moves as some form of training, and his moves will break some form of targets.
Here is my character mood board for the main character that would be motion captured. As I want my character to be some form of martial artist or trained combatant I'm going to have the character performing various moves as some form of training, and his moves will break some form of targets.
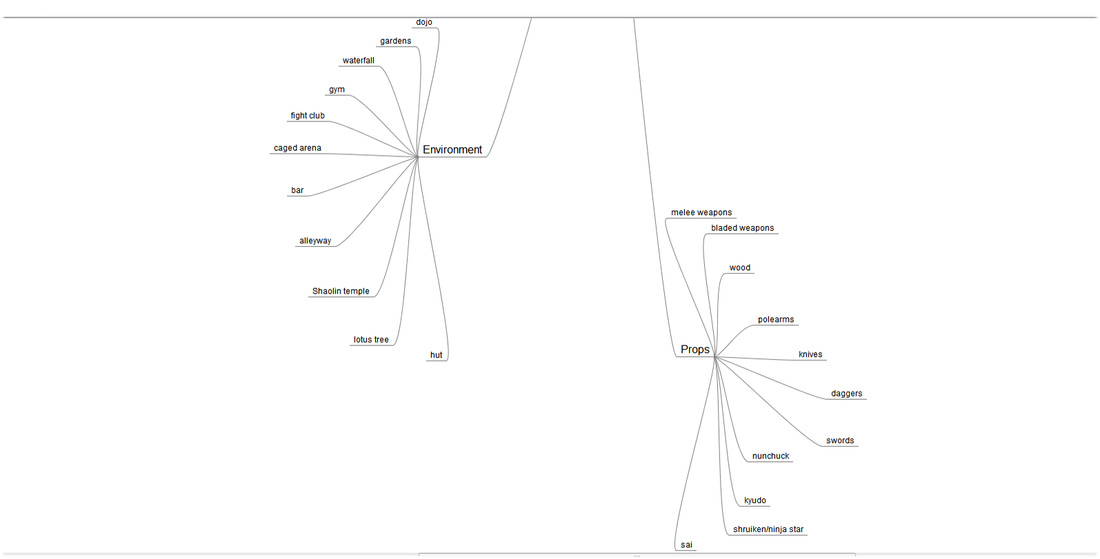
Environment Mood board
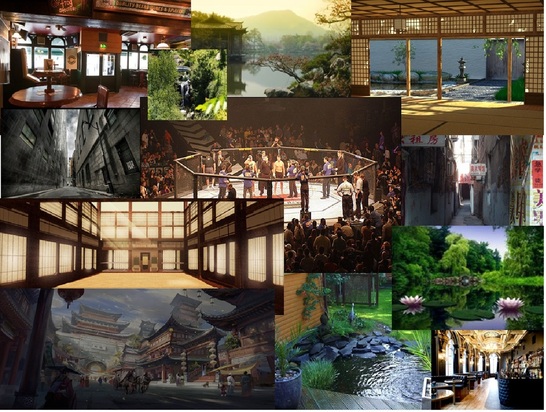
Here is my environment mood board for the above character. I did go with some of the cliches but I feel that the audience could relate better to a character in their stereotyped environment for this short story-less animation. As my character is a martial artist and/or combat proficient I chose environments that would reflect that. I.E. MMA (Mixed Martial Arts) ring, training dojo, etc.
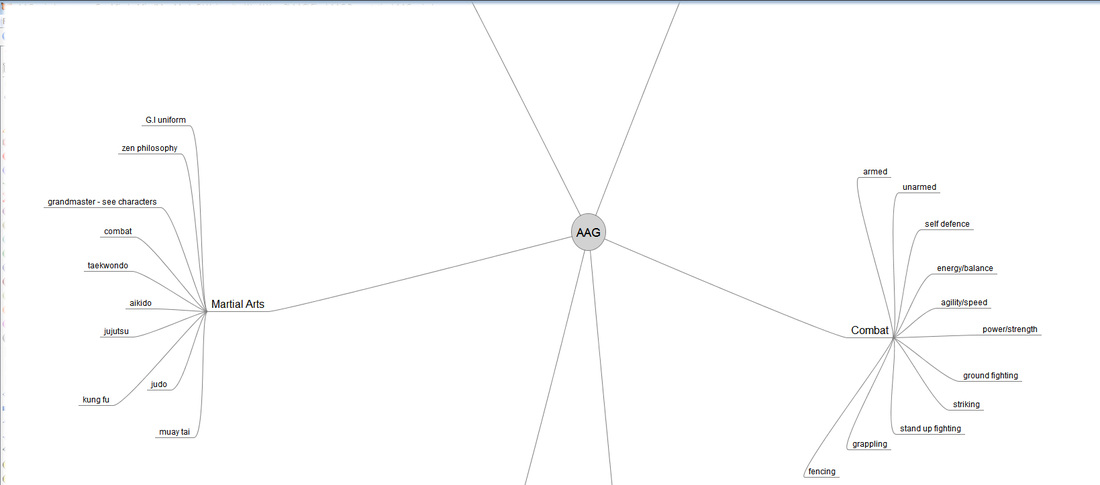
Mind-map
Above and below is a copy of my mind-map along with the mood boards above. This helps me to visualise and decide upon the final characters and environments. Once i've got everything on the table I find it much easier to throw away things with uncertainty and pick the final ideas.
Rayfire Tests
Below are some tests I mocked up using the Rayfire plugin for 3DS Max 2013. I'm not sure what material my character will be breaking but I think i'm going to go with wood, I also trialed concrete to see the outcome from Rayfire.
Project Plan
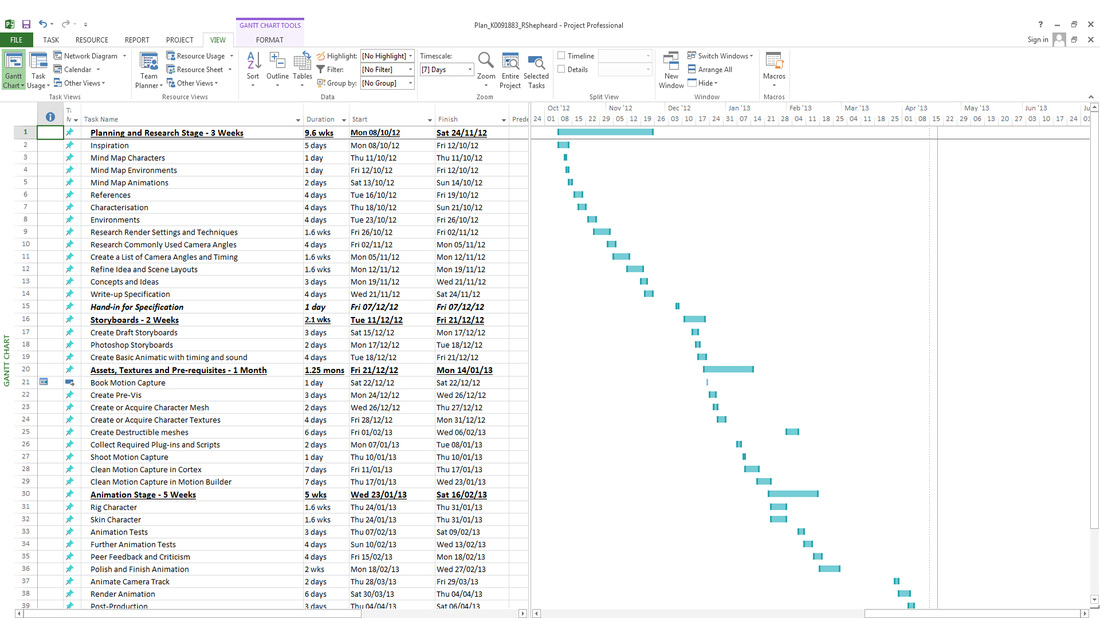
Above is my project plan which outlines my goals and objectives throughout the course of this module. It's going to help me keep on track with my time management and allow me to maintain a realistic and achievable scope of my project.
Storyboard Animatic
This is an animatic compiled from my individual storyboards, it shows the basic layout for what I have in mind for my final animation. This allows me to see the shot composition, timing and camera placement before animation has begun. As i'm no artist I decided to use various free source images of the internet along with a good amount of photo-shopping to avoid using a stock image; also editing them to my needs.
Pre-visualisation
Here is the pre-vis of my animation which expands upon the storyboards above. This allows me to further develop my idea and vision and bring the basis of the storyboards to life within a 3D environment. I haven't included the procedural physics within this previs but I have decided on using wood as my material; an old, tainted wood so it's weak brittle and will splinter easily with force.
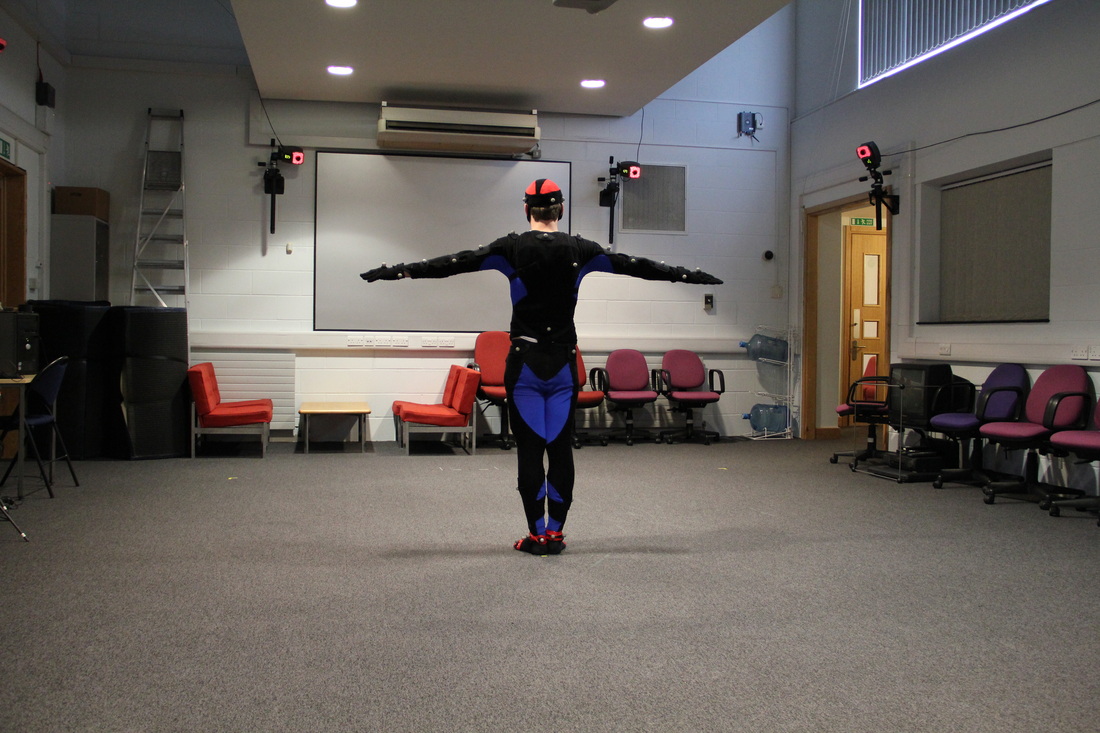
Motion capture
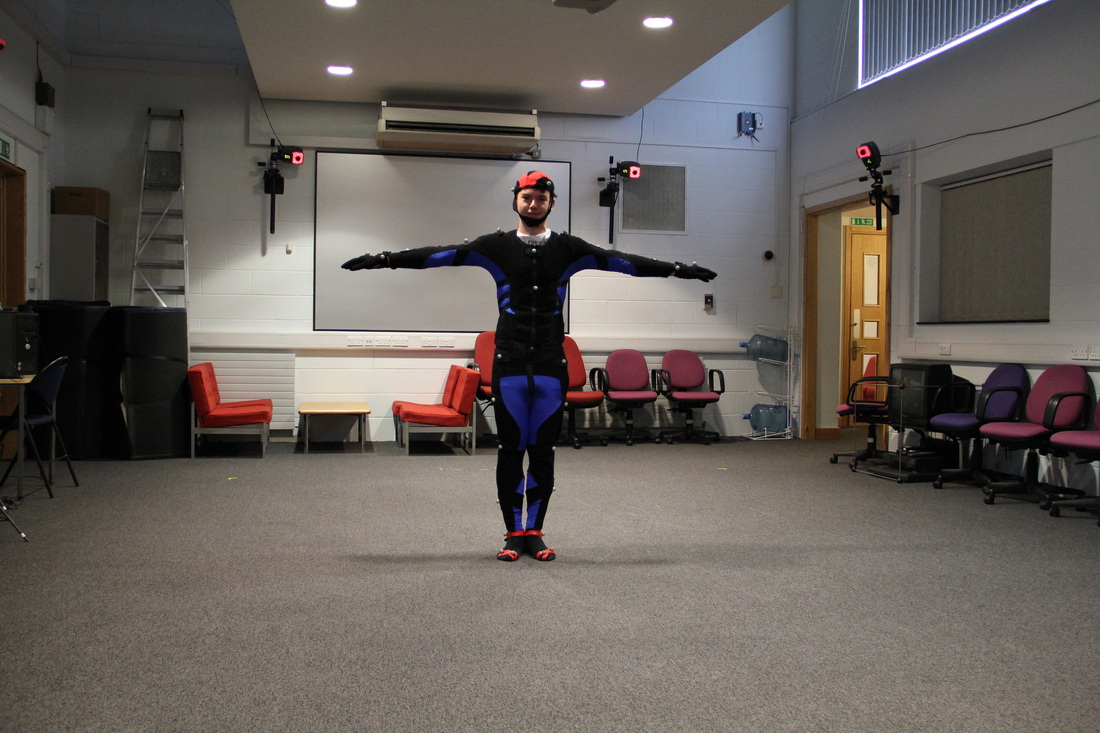
So today was the day of the motion capture shoot. My friend and Teesside graduate James Hunter stepped up to help me. Luckily for me James knows some martial arts and is also accustom to the use of motion capture which helped speed up the process, the whole shoot lasting less than 2 hours. I shot James preforming various moves and techniques he practices at his Martial Arts classes on a regular basis. The motions came across very fluent and natural, much better than if I'd have captured myself.
Motion Capture Clean Up
So I've been cleaning up the motion capture data in Cortex and Motion Builder 2013 and it's now ready to be exported into 3DS Max. Once it's all been exported I'll plant the feet, sort out any noise or jitter within the animation and save then out as .BIP files. There are 20 cleaned files so I have plenty of movements to choose from for the final composition.
Skinning Complete

So the skinning of the rig is finished now. Well close enough to say it's complete, there are a few minor issues. The project is nearing a close now and there are other main factors i'd rather be focusing on. Overall the animation seems to look really good on the mesh and I can't see any huge problems with bone rotations or positions, even though the .BIP files are from a differently sized base rig.

Final Animation
Well here it is folks! The animation is all rendered out and finished. Overall I think it looks really good and I'm happy with the outcome. Try muting the sound and it's a completely different experience. I think the sound really does add to the final animation.
